

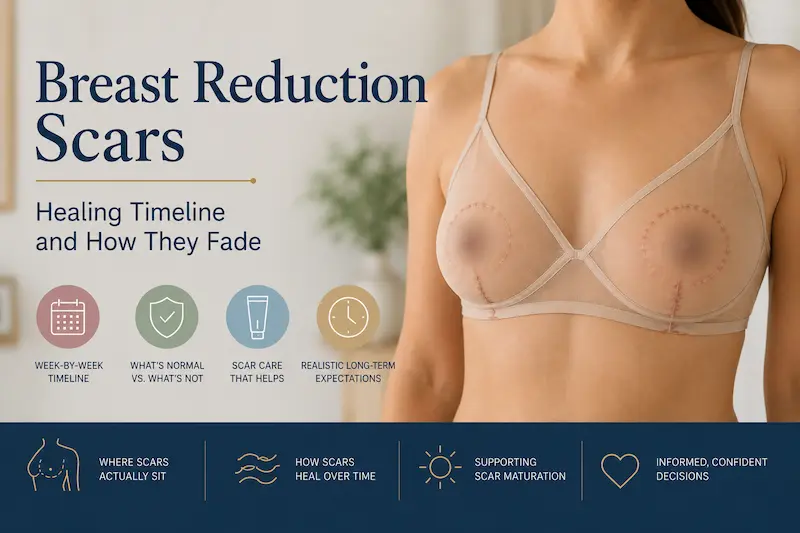
Quick answer: Breast reduction scars are permanent, but they usually change dramatically over time. In the first weeks, they may look pink, raised, firm, or uneven. Over the next 6–12 months, they typically flatten, soften, and fade in colour. The final scar appearance depends on incision pattern, skin tone, tension, aftercare, and individual healing.
For many patients, breast reduction scars are the part of surgery they think about quietly. The relief of lighter breasts can be clear in your mind, but the idea of visible scars around the areola, down the breast, or along the breast fold can feel harder to picture.
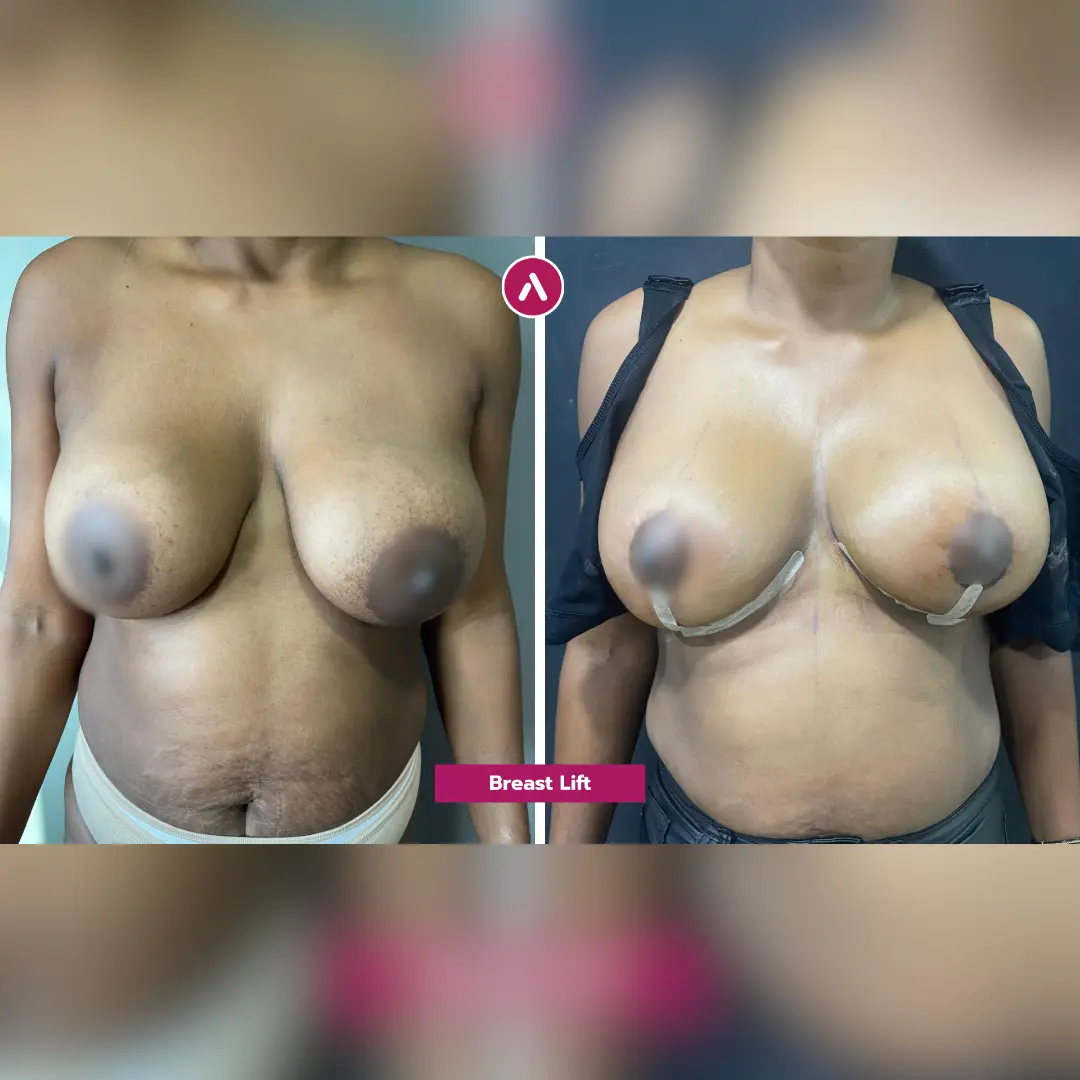
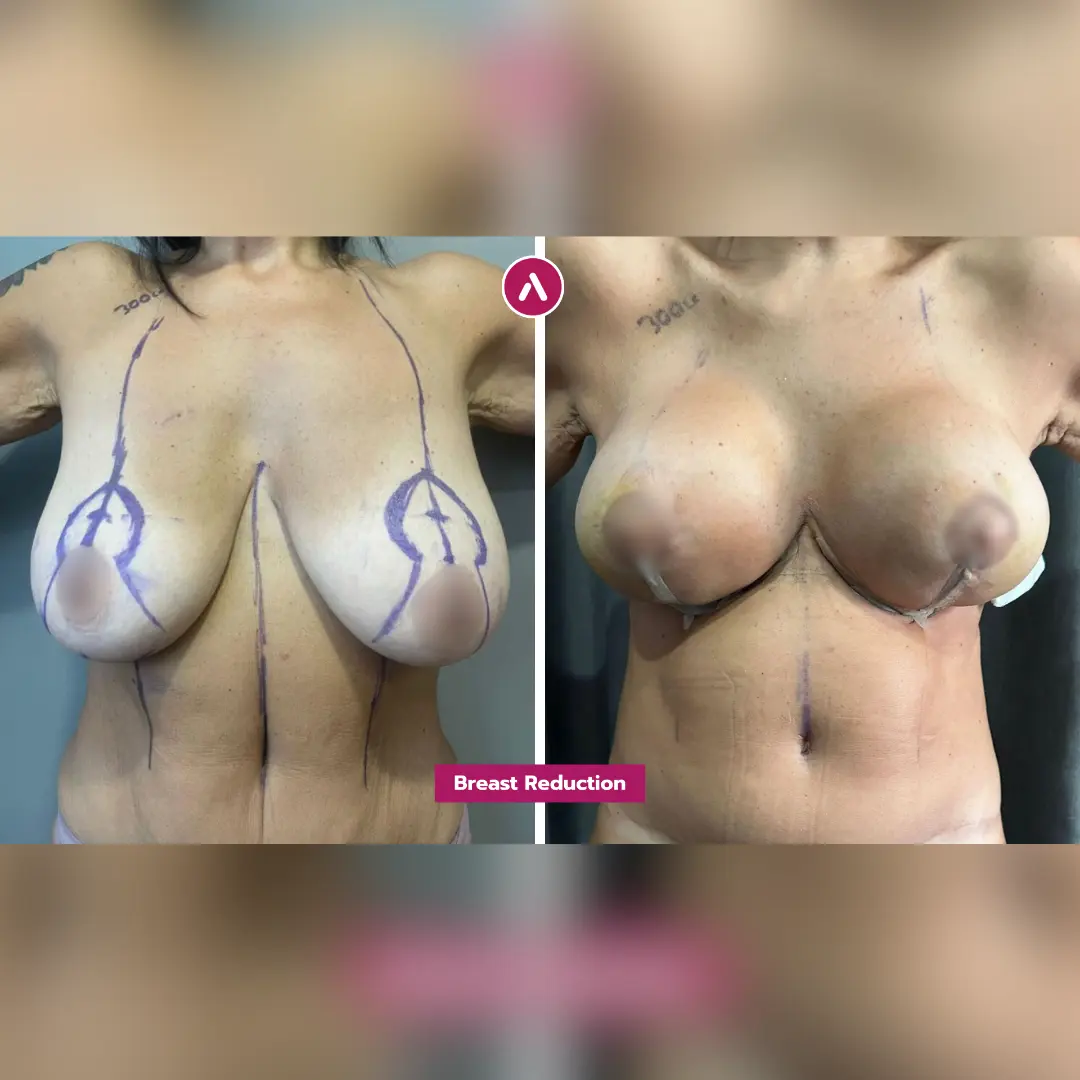
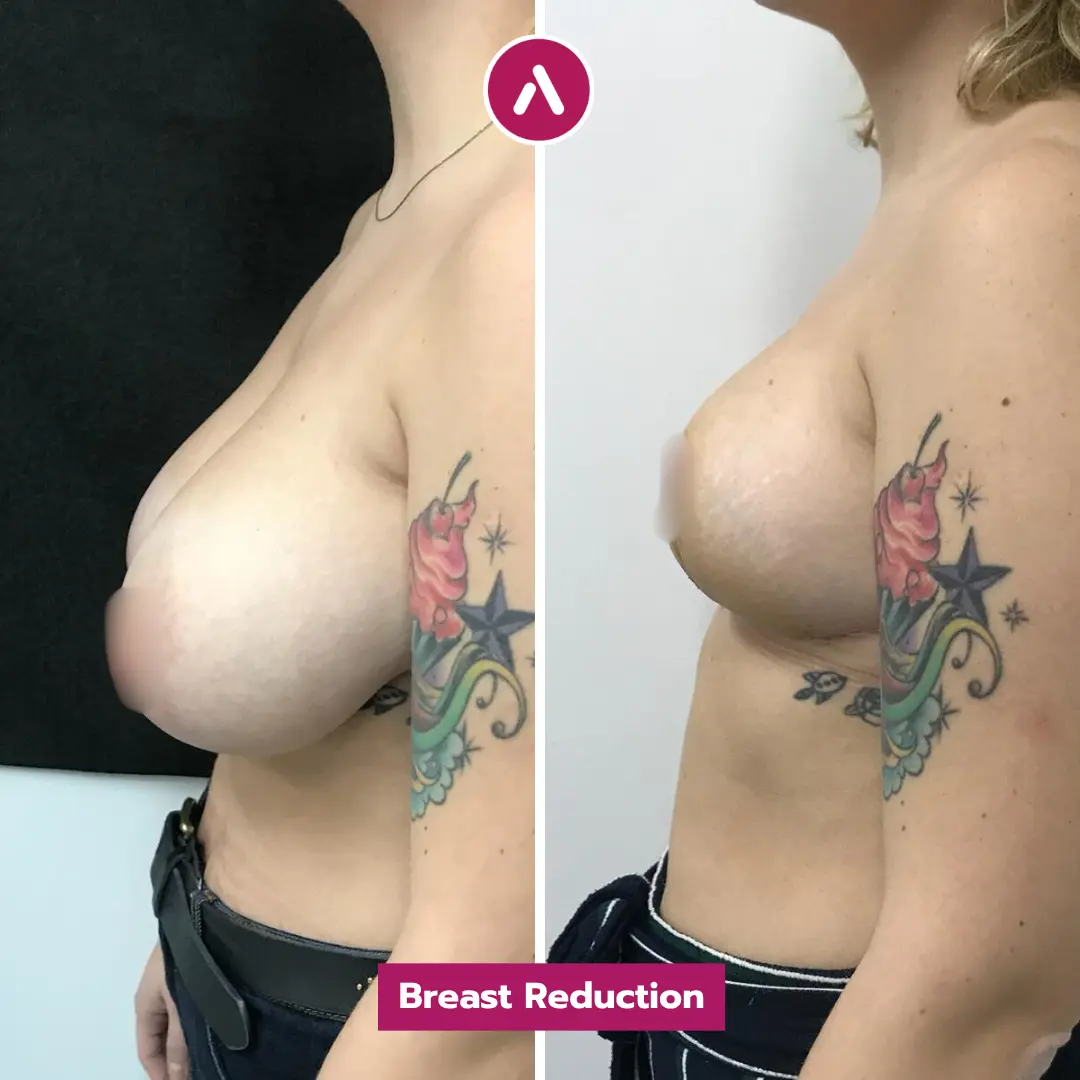
That concern is valid. Scars are part of every breast reduction. What matters is understanding where they sit, how they usually heal, and which changes are normal during the first year. At AKM Clinic, incision planning is part of AKM’s breast reduction procedure, with the goal of placing scars where they can mature as discreetly as possible for your anatomy.
This guide focuses only on scar healing. It does not try to explain the full operation, breast sizing, pricing, or before-and-after galleries. Instead, it walks through the scar timeline: what you may see in the first days, why scars can look more noticeable around weeks 4–8, and how they usually fade by 12 months and beyond.
Table of Contents
Where Breast Reduction Scars Actually Sit
Breast reduction scars are shaped by the incision pattern your surgeon needs to remove tissue, lift the breast, and reposition the nipple safely. A smaller reduction may need a shorter scar pattern. A larger reduction, heavier breast, or more significant lift usually needs a longer incision to remove skin and reshape the breast envelope.
The important point is this: scar length is not chosen randomly. It is linked to safety, blood supply, breast shape, and how much excess skin must be removed. A shorter incision is not automatically better if it leaves poor shape, too much skin tension, or an unstable result.
Anchor, inverted-T, lollipop, and free-nipple patterns
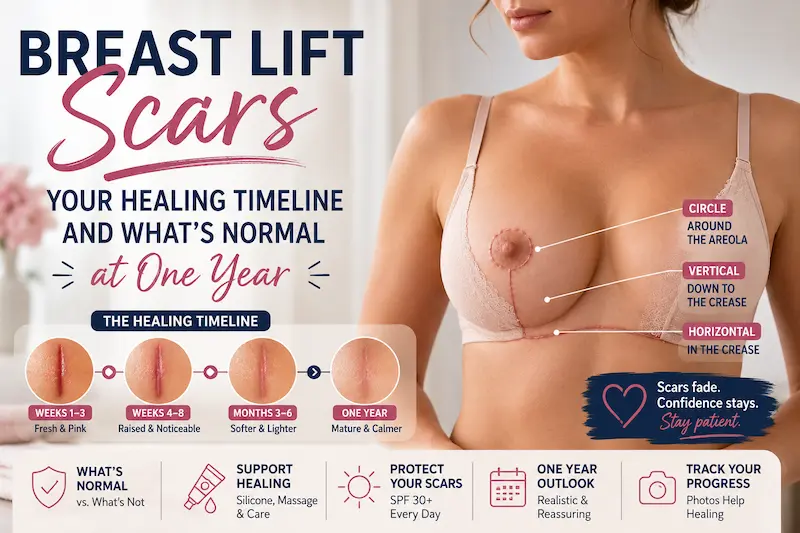
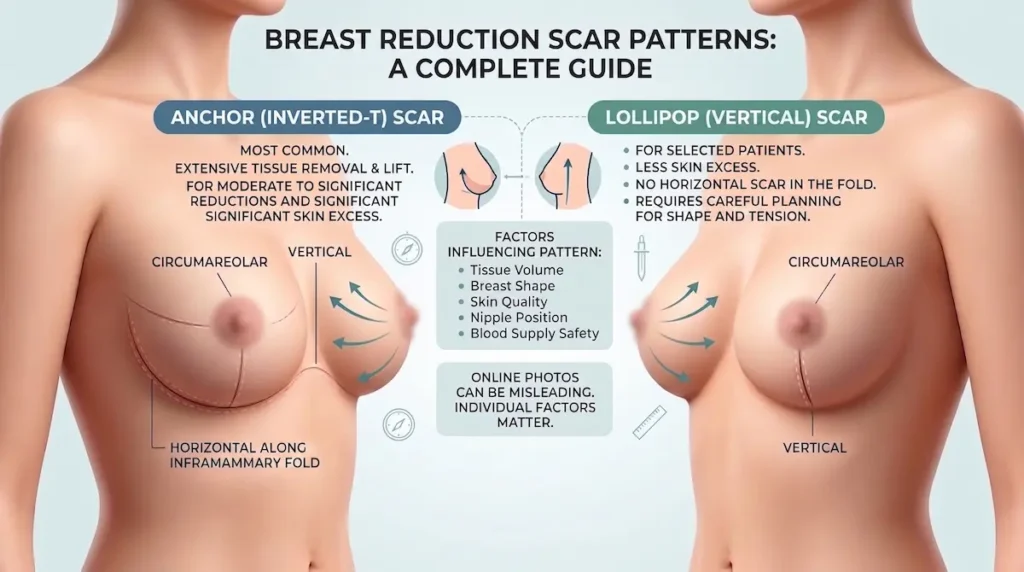
The most common breast reduction scar pattern is the anchor scar, also called an inverted-T scar. It has three parts: a circle around the areola, a vertical line from the areola to the lower breast fold, and a horizontal line hidden along the inframammary fold. This pattern is often used when a patient needs a moderate to significant reduction or has heavier skin excess.
A lollipop scar, also called a vertical scar, has a scar around the areola and a vertical line down the lower breast. It does not usually include the long horizontal scar in the fold. It may suit selected patients with less skin excess and a reduction plan that can be achieved without the full anchor pattern.
A free-nipple graft pattern is less common and is generally reserved for specific cases where nipple blood supply would be at higher risk if the nipple stayed attached to its usual tissue bridge. It can leave scars similar to an anchor reduction, but the nipple-areola complex heals differently because it has been grafted. Your surgeon should explain this clearly if it applies to you.
Why incision choice drives scar length
The scar pattern depends on the amount of breast tissue removed, the degree of sagging, skin quality, breast width, nipple position, and the surgeon’s plan for preserving blood supply. Two patients can ask for the same cup-size goal and still need different incision patterns because their breast shape and tissue behaviour are not the same.
This is why online scar photos can be misleading. A healed lollipop scar may look appealing, but it may not be the safest or most stable option for every breast. In a heavier breast, forcing a short-scar approach can create more tension on the incision and may affect shape, wound healing, or scar quality.
For Canadian patients comparing options carefully, the best question is not only “Can you make the scar shorter?” A better consultation question is: Which incision pattern gives me the safest reduction, the best breast shape, and the least avoidable tension on the scar?
What scars look like in the first days
In the first few days, the scars usually do not look like “final scars” at all. They are fresh incision lines covered with tape, dressings, surgical glue, or a supportive bra. The surrounding skin may look swollen, slightly bruised, shiny, or tight.
You may notice that one side looks more swollen than the other. You may also see mild puckering, small folds near the tape, or darker colour around the incision edges. Early asymmetry is common because swelling rarely settles evenly from side to side.
At this stage, the goal is not scar fading. The goal is safe closure. Keep the dressings clean and dry according to your surgeon’s instructions, avoid pulling on the incisions, and do not start scar creams, massage, or silicone products until your surgical team confirms the skin is sealed.
The Week-by-Week Healing Timeline
Breast reduction scar healing is not linear. Many patients expect scars to look better every week, but scars often become more noticeable before they begin to fade. Around weeks 4–8, it is common for incision lines to look pinker, firmer, thicker, or slightly raised as collagen activity increases.
That phase can feel discouraging. It does not automatically mean something is wrong. Scar maturation is a slow process, and the most meaningful changes usually happen over months, not days.
| Healing stage | Typical scar appearance | Usually normal | Supportive action |
|---|---|---|---|
| Weeks 1–3 | Fresh, taped, swollen, bruised, slightly uneven | Mild redness, tightness, itching, light asymmetry | Protect the incisions, wear support garments as instructed, avoid tension |
| Weeks 4–8 | Pink, red, firmer, raised, more noticeable | Scars looking “worse” before they improve | Ask your surgeon when to begin silicone, massage, or taping |
| Months 3–6 | Flatter, softer, less angry in colour | Slow fading with occasional firmness | Continue sun protection and approved scar care consistently |
| Months 9–12+ | Paler, flatter, more blended with surrounding skin | Residual lines, colour differences, or texture changes | Review mature scars with your surgeon before considering revision options |
Weeks 1–3: fresh, taped, swollen
During the first three weeks, the incisions are still fragile. The scar line may be hidden under tape or dressings, so what you see is often swelling and bruising rather than the true scar. The breasts may feel tight, high, firm, or uneven.
Itching can begin as the skin closes. Mild itching is often part of healing, but scratching the incision is not safe. If itching is intense, paired with spreading redness, or linked to a rash from tape or adhesive, ask your surgical team for guidance before applying anything new.
Small areas of dried blood or crusting can also be normal early on. Do not pick at scabs. Removing them too soon can reopen the skin and make the scar more visible later.
Weeks 4–8: the raised, pink “looks worse” phase
This is the stage that surprises many patients. Just when the bruising is improving and daily movement feels easier, the scars may become more obvious. They may look pink, red, purple, raised, rope-like, or firm to the touch.
This happens because the body is actively building and reorganising collagen. Collagen is necessary for strength, but early collagen can look thick and uneven before it remodels. A scar that looks more noticeable at week six can still settle beautifully by month six or month twelve.
That said, not every change should be ignored. If a scar is opening, draining pus, becoming increasingly painful, spreading redness into surrounding skin, or developing a widening dark area, it belongs in a different category and should be reviewed promptly by your surgeon.
Months 3–6: flattening and softening
By months three to six, many scars begin to lose their raised, active look. They may still be visible, but they often feel softer and less tight. The colour may shift from bright pink or red toward a lighter pink, brown, or muted tone depending on your skin.
For deeper skin tones, fading does not always mean the scar becomes pale. Some scars mature with post-inflammatory hyperpigmentation, where the line looks darker than the surrounding skin for longer. Others may look lighter. Both patterns can be part of normal scar maturation.
This is also the period when consistency matters. If your surgeon has cleared silicone gel, silicone sheets, scar massage, or taping, these tools usually need steady use rather than occasional use. Scar care works slowly. It is more like training tissue than erasing a line.
Months 9–12+: final fade and maturation
By nine to twelve months, the scars are usually much closer to their mature appearance. They tend to be flatter, smoother, and less reactive. The horizontal scar in the breast fold may be easier to conceal because of its position, while the vertical scar can take longer to feel visually quiet.
Some patients continue to see improvement beyond one year. This is especially true for thicker scars, darker colour changes, or areas that were under more tension. Scar maturation can continue into the second year, even when most of the visible healing has already happened.
It is also important to be realistic. Mature does not mean invisible. A good breast reduction scar is usually a fine, settled line that no longer draws the eye easily. It may still be visible when you look closely, change with temperature, or stand out slightly against your natural skin colour.
What’s Normal vs Worth Flagging
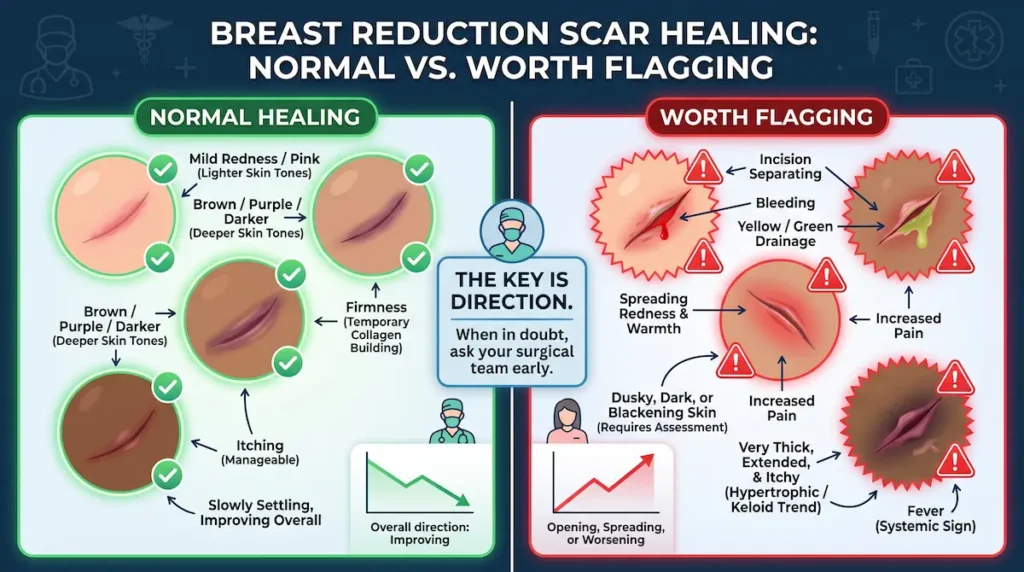
Scar healing can feel confusing because “normal” does not always look neat. A breast reduction incision may be pink, firm, itchy, slightly uneven, or more visible than expected during the early scar-building phase. Those changes can be part of healthy healing, especially when both breasts are improving overall.
The key is direction. A scar that is slowly settling, even if it looks active, is different from a scar that is opening, draining, becoming more painful, or spreading redness into nearby skin. When in doubt, ask your surgical team early. A small concern is easier to assess than a delayed wound problem.
Normal redness, firmness, and itch
Mild redness or pink colour along the incision is common in the first months. In deeper skin tones, the same healing activity may look brown, purple, or darker than the surrounding skin. Colour alone does not always mean trouble.
Firmness is also common. Scar tissue contains new collagen, and early collagen is not arranged smoothly at first. This can make the scar feel raised, thick, tight, or slightly rope-like before it softens.
Itching often appears as nerve endings wake up and the skin barrier repairs. It should be manageable. If itching is severe, paired with rash, blistering, spreading redness, or new drainage, it may be irritation, allergy, or infection rather than routine healing.
Signs to raise with your surgeon
Contact your surgeon if the incision begins to separate, bleeds repeatedly, drains yellow or green fluid, smells unpleasant, or becomes increasingly painful after it had been improving. Fever, spreading warmth, and redness that extends away from the incision also deserve prompt review.
Another sign to flag is a scar that becomes increasingly thick, raised, itchy, and extends beyond the original incision line. That may suggest hypertrophic scarring or keloid tendency, especially in patients with a personal or family history of raised scars.
Dark, dusky, or blackening skin near an incision should not be watched casually. It needs professional assessment. This article stays focused on the scar timeline, so raise any wound concern or possible healing complication directly with your surgeon.
How skin tone and body area affect appearance
Skin tone can change how scars mature visually. Lighter skin may show pink or red scars for months. Medium and deeper skin tones may be more prone to darker post-inflammatory colour changes or, in some cases, raised scar behaviour.
The breast fold, vertical incision, and areola border can also mature differently. The fold scar may be hidden by the breast crease but can stay thicker if there is friction from bras or movement. The vertical scar is more visible at first but often softens well once tension decreases.
Areola-border scars can blend nicely because the colour transition between areola and breast skin helps camouflage the line. Still, pigment changes can happen there too. A well-healed scar can be visible and still be a normal, acceptable result.
Canadian planning note: Before travelling, ask whether your surgical plan will be reviewed by an RCPSC-equivalent, European Board-Certified surgical team and how post-operative scar concerns are handled once you are back in Canada. Do not rely on photos alone. Ask about incision choice, wound follow-up, and what documentation you will receive for your local provider if a concern arises.
Supporting Scar Maturation
Scar care is not about making an incision disappear overnight. It is about protecting the healing line while collagen matures. The most useful steps are usually simple: reduce tension, protect from sun, use silicone only when the incision is fully closed, and give the tissue enough time to remodel.
Start scar products only when your surgeon says the skin is sealed. Applying gel, oil, cream, or sheets too early can irritate the incision or trap moisture where the skin is not ready. Your team’s timing matters more than a product label.
Silicone sheets, silicone gel, and timing
Silicone is one of the most commonly recommended scar-care tools after surgical incisions have closed. It may help scars stay flatter, softer, and better hydrated during the active maturation phase. It is not a magic eraser, and it does not remove the genetic tendency to scar.
The evidence should be framed honestly. The Cochrane review on silicone scar therapy found that silicone gel sheeting may help some hypertrophic scars, but the certainty of evidence is limited. That means it can be reasonable to use, but it should not be promised as a guaranteed fix.
Many surgeons recommend silicone for several hours per day or overnight, often for a period of weeks to months. The exact schedule depends on the product, your skin tolerance, and your healing stage. If the skin becomes itchy, macerated, blistered, or irritated, pause and ask your surgeon before continuing.
Sun protection and why it matters
Fresh scars are more reactive to ultraviolet exposure. Sun can deepen colour changes and make a scar stay darker or more noticeable for longer. This matters even if the scars are usually covered, because swimwear, low-cut clothing, or outdoor recovery periods can expose parts of the incision.
Once the incision is fully closed and your surgeon allows it, protect the area with clothing or broad-spectrum sunscreen. Clothing coverage is often the simplest option for breast reduction scars because the incision pattern sits under bras and swimwear, but it still requires attention during holidays and summer months.
Canadian scar-care guidance also tends to emphasize the basics: a clean healing environment, protection from tension, and avoiding unnecessary irritation while the skin barrier recovers. Canadian scar-care principles on wound maturation support the same cautious approach: protect the wound first, then use scar therapies once the skin is ready.
Massage, taping, and patience
Scar massage may help some patients once the incision is closed and stable. It is usually introduced gently, using light pressure at first. The goal is not to “break down” the scar aggressively. Too much force can inflame the tissue and make the scar feel more reactive.
Taping can help reduce tension across the scar in selected patients, especially around areas that move or pull. It should be used only if your surgical team recommends it, since adhesive sensitivity is common after surgery and can create its own irritation.
Patience is not passive. It means giving the scar a stable environment while the body remodels collagen. Good support garments, careful movement, nutrition, hydration, and follow-up all help the scar mature without unnecessary stress.
Scar maturation is measured in months, not weeks. A breast reduction scar that looks pink, raised, or firm at six weeks can still become a much softer, flatter line by one year. The goal is steady progress, not a perfect-looking incision in the early healing phase.
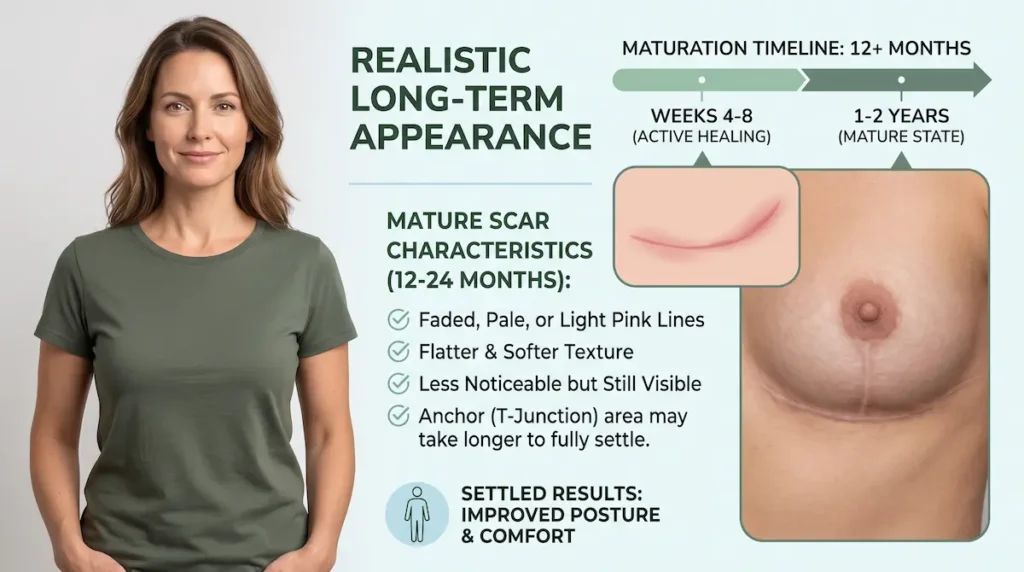
Realistic Long-Term Appearance
By the time breast reduction scars reach the 12-month mark, most have moved out of the active healing phase and into a more mature state. They are usually flatter, softer, and less noticeable than they were at weeks 4–8. Still, realistic expectations matter: a scar can fade well and remain visible.
This is also the stage where patients often judge the result more calmly. The breasts have settled, swelling has reduced, and the scar is easier to see in context rather than as the only thing your eye notices. For many patients, the trade-off feels worthwhile once discomfort, heaviness, posture strain, and clothing limitations improve.
How faded scars typically look at 1–2 years
At one to two years, mature breast reduction scars often look like fine lines around the areola, down the lower breast, and sometimes along the breast fold. The colour may be pale, light brown, darker brown, or slightly pink depending on your natural skin tone and scar biology.
The anchor or inverted-T scar may remain most visible where the vertical and horizontal lines meet. This “T-junction” area often carries more tension during early healing, so it may take longer to settle. That does not mean the scar is failing; it simply means that part of the incision may mature more slowly.
It is also worth separating breast reduction scars from mastopexy scars. A breast lift can use similar incision shapes, but the surgical goal and tissue removal are different. If you are comparing procedures, read the difference from breast lift scars rather than assuming both scar patterns heal identically.
Camouflage, tattooing, and revision as last resorts
Most patients do not need scar revision. The first step is usually time, followed by consistent scar care once the incision is closed. If a scar remains raised, widened, or highly pigmented after full maturation, your surgeon may discuss non-surgical treatments, camouflage options, medical tattooing, or revision.
These choices should come late, not early. Revising a scar before it has matured can create more inflammation and may not solve the underlying reason the scar formed that way. A scar that is still changing at six months is often not ready for a final judgement.
Before considering camouflage or revision, ask whether the scar is truly mature, whether your skin has a tendency toward hypertrophic or keloid scarring, and whether the breast shape is stable. The answer may be different at one year than it was at three months.
Setting expectations before surgery
The best time to discuss scars is before surgery, not after the dressings come off. Ask where each incision will sit, which scar pattern your anatomy is likely to need, and how your surgeon handles aftercare if a scar becomes raised, widened, or slow to close.
You can also ask to review healed outcomes from patients with similar incision patterns and, when possible, similar skin tone. For a broader results context without turning this scar guide into a gallery, visit verified healed-scar outcomes.
Cost may also come up during planning, especially for Canadians comparing private surgery options. This article does not break down pricing because it is focused on scar healing, but you can review breast reduction cost in CAD separately.
A careful consultation should leave you with three clear answers: what scar pattern is likely, why that pattern is safest for your anatomy, and what scar-care support you will have after returning home. That clarity can reduce anxiety and help you view healing as a timeline rather than a day-by-day judgement.
Frequently Asked Questions: Breast Reduction Scars
These questions focus on scar healing only. For general recovery, size planning, complications, or pricing, use the linked guides above so each topic stays clear and medically useful.
How long do breast reduction scars take to fade?
Why do my scars look worse after a month?
Do silicone sheets really work?
Will the scars ever fully disappear?
Are anchor scars worse than lollipop scars?
Can darker skin tones expect different scarring?
When can I start scar massage?
What should I ask my surgeon before travelling for breast reduction?
Medical Disclaimer: This article is for general educational purposes only and is not medical advice. Breast reduction scar healing varies from person to person based on anatomy, skin tone, incision pattern, aftercare, medical history, and individual scar biology. Always follow the instructions of your own qualified healthcare professional and contact your surgical team if you notice wound separation, unusual drainage, spreading redness, fever, severe pain, or any other concern.